
Getting Here
95 Main Street
Durham, NH 03824
United States
How to Reserve a Non-Registrar Owned Classroom
This room is not under the control of the University Registrar's Office. Please contact the department administration for booking availability.
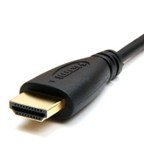
HDMI Connection
- Make sure your device is powered on and awake.
- Connect your device using the supplied HDMI cable.
- If your device requires a display adapter, connect adapter to cable first, then connect adapter to your device.
- If necessary, select your desired source connection on the AV Touch Panel.
Presenting from a Laptop Computer in a Classroom or Learning Space
- If your device requires a display adapter to connect to the provided HDMI or USB-C cable, connect the cable to the adapter first, then connect the adapter to your device.
- If your system is powered on and awake, the system should automatically start displaying your laptop.
- Note: If you need a USB-C to HDMI adapter, we have thoroughly tested and recommend the Anker 5-in-1 USB-C adapter, available on Amazon and other vendors.
Amazon Link
- Note: If you need a USB-C to HDMI adapter, we have thoroughly tested and recommend the Anker 5-in-1 USB-C adapter, available on Amazon and other vendors.
- If the system does not auto-start, you may need to select the Laptop, HDMI or USB-C source icon on the AV touch panel.
- After the projector or display has powered on, the computer's image should display on the projection screen.
- If the projection image is not displaying correctly or if the sound is not coming through the room speakers, see the troubleshooting sections below.
For more information and detailed Mac and Windows troubleshooting, visit the related Knowledge Base Article.
Sharing Video Content
To share video and audio content to rooms B01 or B01A
Select the Share button on the AV touch panel. Green button color means Sharing is enabled. Sharing will enable the sending of all camera and microphone content to rooms B01 or B01A.
To display this content in rooms B01 or B01A, select the new B01A Studio room source on the AV touch panel in those rooms.
Select the Share button again to disable content sharing. Red button color means Sharing is disabled.
Using the Power button on the AV touch panel to shutdown the confidence monitor will also disable all sharing to rooms B01 or B01A.
Storing a recording to USB drive
To record media content to your USB drive, connect the USB Thumb Drive or External Hard Drive to the port marked “USB” on the Crestron CAPTURE HD-PRO device, located in the AV equipment rack in room B01. Your drive must be 8GB capacity or larger, and formatted as FAT/32.
On the touch panel, press the Start Here button. The next page shows the recording volume adjustment settings. This is where all volume adjustments for the recording are made. The settings for volume are 0 - Lowest, 1 - Middle, 2 - Highest. After adjusting the recording audio level, press the Start Recording button.
To end the recording, select Stop Recording. The system will display a message about finalize the recording. When the message goes away it is safe to remove your USB media. All recordings are exported in the .mp4 video format.
Classroom Training, Laptop Tips, and Advanced Troubleshooting
For laptop tips and troubleshooting:
Laptop Troubleshooting Knowledge Base Article
Need assistance or want to schedule a one-on-one AV training session? Call the AV Services Hotline at Ext. 2467 (603-862-2467) at any time.


- Media Studio
- Capacity: 4
- Ceiling Mounted Microphones
- HDMI Connection
- Sound System
- Touch Panel Control System
- Touch Panel Lighting Controls
- Video Conference Camera
- Wall Mounted Flat Panel Monitor