Getting Here
95 Main Street
Durham, NH 03824
United States
How to Reserve a Non-Registrar Owned Classroom
This room is not under the control of the University Registrar's Office. Please contact the department administration for booking availability.
USB-C Connection - One Cable Solution
- Make sure your device is powered on and awake.
- Connect your device using the supplied USB-C cable
- If necessary, select the USB-C source icon on the AV Touch Panel
The USB-C connection can be used to connect to classroom display(s), audio system, ceiling mounted microphones, both the front and rear mounted cameras, and provides power to the device.

AirMedia Wireless Presentation Quick Connection Steps
This room does NOT require the AirMedia Application
To present wirelessly from your device:
- Make sure your device is powered on, awake, connected to ‘eduroam’ Wi-Fi, and Bluetooth is enabled.
- Select the AirMedia source icon on the audiovisual touch panel and follow the projected instructions.
For Windows based devices:
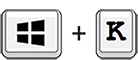
Press and Hold the Windows icon & letter K keys to launch the Casting Menu, select the associated room, and enter the code.
Example: MURK101
For MacOS based devices:

Use the Mac Control Center to access Mac Screen Mirroring

Select the Screen Mirroring Icon, select the associated room, and enter the code.
Example: MURK 101
For more information, follow the training guides available in the AirMedia Guides Knowledge Base Article.

or watch the AirMedia Quick Connect training video by clicking on the AirMedia icon.
Lecture Capture & Hybrid Compatible Selections
The installed camera(s) and microphone(s) in this room can be used with recording or videoconferencing applications.
The USB-C cable that connects your device to the room's display(s) and audio system will also provide the device access to the installed lecture capture equipment.
Windows Device Selections:

Set Speaker to → Crestron 420 (Intel (R) Display Audio)

Set Microphone to → Line In (paul-rm###-dsp Sound Card)
*Note: You will see the room# your in listed in the microphone selection name.

Set Camera to → Crestron 1 Beyond i12
*Note: Some classrooms will have a different camera selection option like Pro Convert IP to USB
MacOS Device Selection:

Set Speaker to → Crestron or Crestron (HDMI)
Set Microphone to → hs-rm###-dsp Sound Card
*Note: You will see the room# your in listed in the microphone selection name.
Set Camera to → Crestron 1 Beyond i12
Switching Camera Angles & Whiteboard Presets:
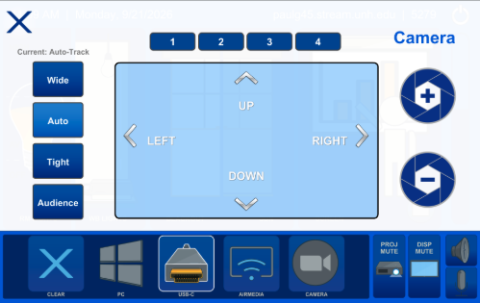
Change camera angles and whiteboard presets by first pressing the Camera source icon on the touch panel
Use the camera menu touch panel screen to change between auto-tracking, wide camera shot, tight camera shot, and the audience camera mode. There are multiple whiteboard presets available or you can choose to set the cameras focus manually.
Example Camera Control Menu from Touch Panel:
iClicker Cloud Application
- Launch the iClicker Cloud application
- Sign in through the campus portal 'University of New Hampshire Main Campus'
- Use your USNH SSO credentials to log in
- Select desired iClicker Course and press 'Start Class'
iClicker Cloud does not require physical remotes or the base station to be used. For information about iClicker Cloud, view the UNH iClicker Cloud Knowledgebase Article.
Should your class require use of the physical iClicker Base Station for student remote connections, one can be reserved for delivery through the LST WebCheckout Patron Portal
Installed Microphone System
This classroom has an installed microphone system:
Classroom Laptop Troubleshooting, Tips & LST Assistance
For laptop tips and troubleshooting:
Laptop Troubleshooting Knowledge Base Article
Need assistance or want to schedule a one-on-one AV training session? Call the LST Help Line at Ext. 2525 (603-862-2525) and select menu option #1.


- Lecture
- Capacity: 40
- AirMedia Wireless Presentation
- Audience Facing Camera
- Ceiling Mounted Microphones
- Document Camera
- Handheld Microphone(s)
- iClicker Cloud Supported
- Installed Windows Computer
- Instructor Facing Camera
- Lavalier Microphone(s)
- Lecture Capture & Hybrid Compatible
- Podium Tablet Monitor
- Sound System
- Touch Panel Control System
- Touch Panel Lighting Controls
- USB-C Connection
- Video/Data Projector
- Wall Mounted Flat Panel Monitor
- Whiteboards