
Getting Here
95 Main Street
Durham, NH 03824
United States
How to Reserve a Registrar Owned Classroom
This room is under the control of the University Registrar's Office. To request reservation of this classroom:
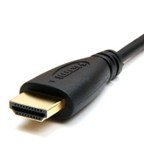
HDMI Connection
- Make sure your device is powered on and awake.
- Connect your device using the supplied HDMI cable.
- If your device requires a display adapter, connect adapter to cable first, then connect adapter to your device.
- If necessary, select your desired source connection on the AV Touch Panel.
Lecture Capture & Hybrid Compatible Selections
The installed camera(s) and microphone(s) in this room can be used with recording or videoconferencing applications.
Use the provided USB-A cable to connect your device to utilize the installed lecture capture equipment.
Windows Device Selections:
Set Speaker to → Crestron (Intel (R) Display Audio)

Set Microphone to → Shure P300
*Note: Some classrooms will have a different microphone selection option like Avia-DSP or Inogeni

Set Camera to → INOGENI#####, Rear Camera or Front Camera (Mini USB)
MacOS Device Selection:
Set Speaker to → Crestron (HDMI) or Crestron 420 (USB-C)
*Note: Crestron Audio is associated with the AirMedia wireless presentation
Set Microphone to → Shure P300
*Note: Some classrooms will have a different microphone selection option like Avia-DSP or Inogeni
Set Camera to → INOGENI#####, Rear Camera or Front Camera (Mini USB)
iClicker Base Station Hardware
This room includes a physical iClicker base station, to be used during classes where the instructor or students need to use physical iClicker remotes.
- Connect the iClicker-labeled USB cable to either your laptop, installed PC USB Hub, or installed Mac USB Hub.
- Launch iClicker software. If necessary, input base station frequency inside iClicker Course Settings.
- For more iClicker information, view the UNH Knowledgebase Articles
- To request iClicker training please fill out a UNH Documentation & Training request Form
Note: iClicker Cloud does not require physical remotes or the base station to be used. For information about iClicker Cloud, view the UNH iClicker Cloud Knowledgebase Article.
If necessary, input base station frequency "A C" inside iClicker Course Settings.
Presenting from a Laptop in a Classroom or Learning Space
- If your device requires a display adapter to connect to the provided HDMI cable, follow these steps:
- Connect the HDMI cable to the display adapter.
- Connect the adapter to your device.
- Make sure your device is powered on and awake.
- Once connected, your laptop display should appear automatically on the classroom system.
- If you need a USB‑C–to‑HDMI adapter, USNH has tested and recommends the Anker 6‑in‑1 USB‑C-to-HDMI Multiport Adapter which is available from Amazon and other retailers.
- Once connected, your laptop display should appear automatically on the classroom system.
Note: If your classroom utilizes a USB-C connection, please connect your laptop directly using the provided USB‑C cable only. Do not use this connection with an adapter, as the USB‑C cable is designed to work with most laptops and adapters can prevent proper display and connectivity.
Select your input source and verify display
- If the system does not start automatically, use the AV touch panel to select the appropriate input source:
- HDMI
- USB‑C
- AirMedia
- After selecting the input, allow the projector or display time to power on. Your computer’s image should appear on the projection screen; this may take up to 60 seconds.
For more information and detailed Windows and Mac troubleshooting, visit the related Knowledge Base Article.
Classroom Laptop Troubleshooting, Tips & LST Assistance
For laptop tips and troubleshooting:
Laptop Troubleshooting Knowledge Base Article
Need assistance or want to schedule a one-on-one AV training session? Call the LST Help Line at Ext. 2525 (603-862-2525) and select menu option #1.


- Suitable for Active Learning
- Capacity: 80
- Audience Facing Camera
- Ceiling Mounted Microphones
- HDMI Connection
- iClicker Supported
- Instructor Facing Camera
- Lecture Capture & Hybrid Compatible
- Sound System
- Touch Panel Control System
- Touch Panel Lighting Controls
- Video/Data Projector
- Wall Mounted Flat Panel Monitor
- Whiteboard